This post contains affiliate links. When you purchase through these links, I may earn a commission at no cost to you.
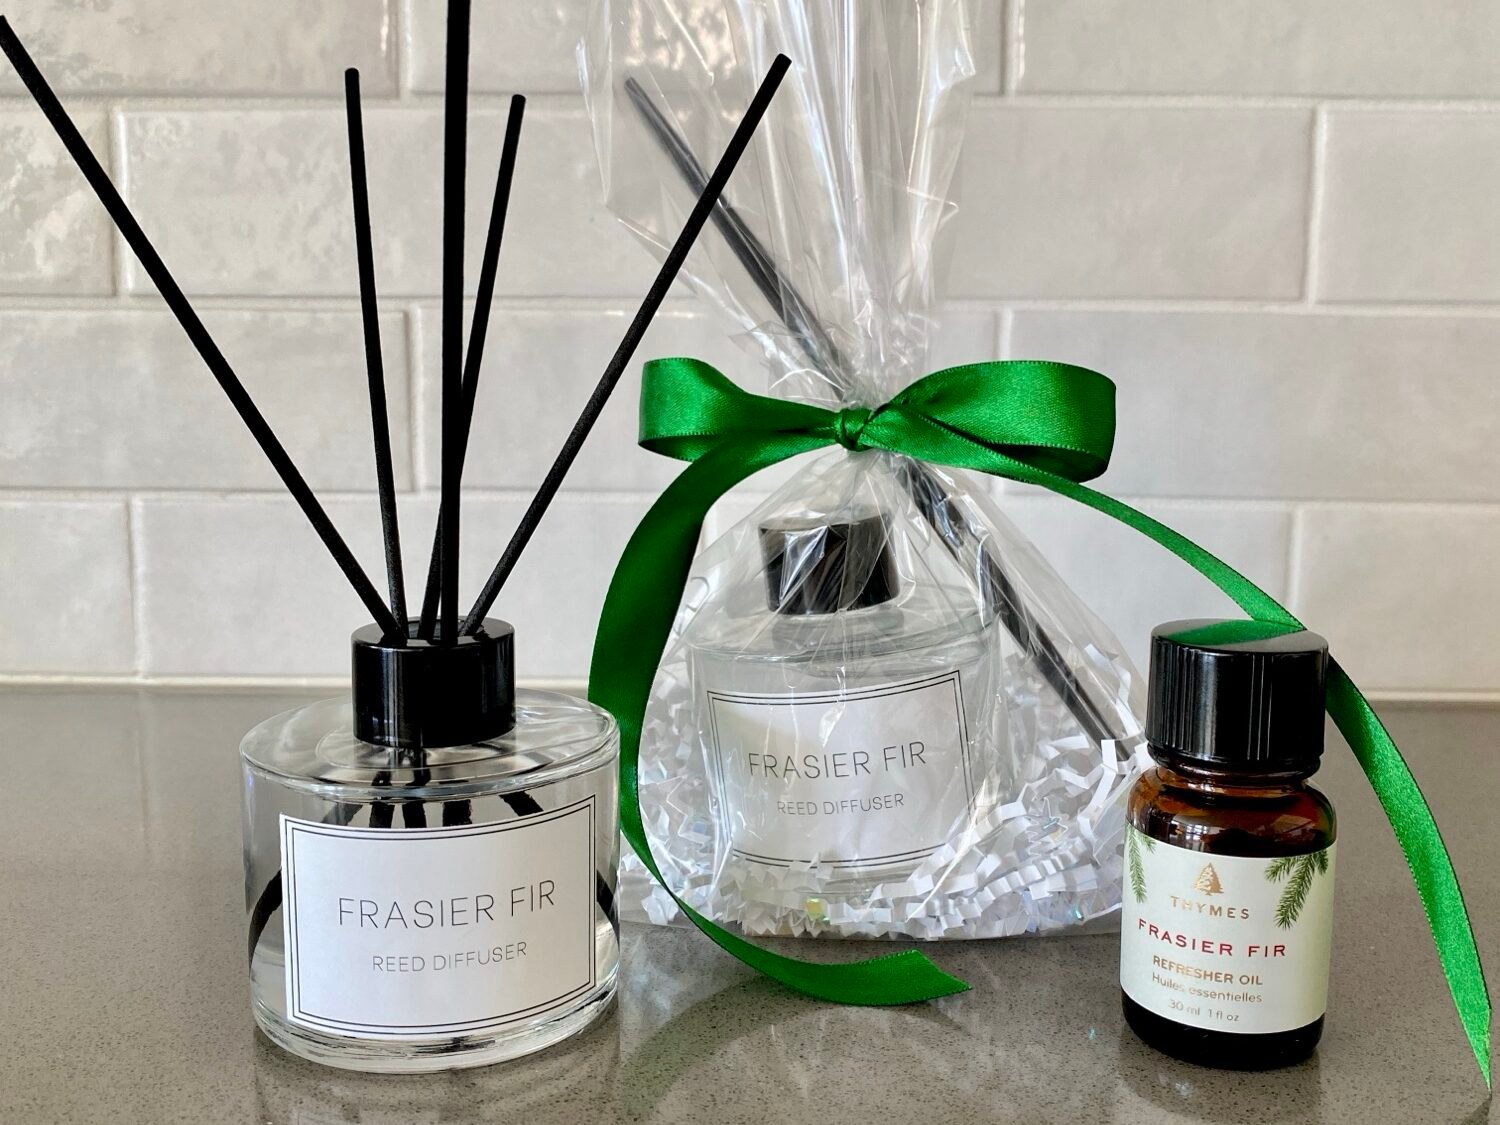
These DIY reed diffusers are the perfect teacher gift or neighbor gift for the holidays! They are easier than they look and completely customizable. Try these out and gift something that will be loved all year long!
Instructions (Makes 4 Diffusers)
Supplies:
- 4 Reed Diffuser Bottles & Reeds
- 16 oz Carrier Oil
- Fragrance Oil
- DIY Labels (optional)
- Cellophane Bags
- Crinkle Cut Paper
- Ribbon & Gift Tag
Instructions:
- Pour carrier oil into a large liquid measuring cup or pitcher.
- Add 1.5 tsp of fragrance oil to the carrier oil and mix. You can add an additional half teaspoon of fragrance oil if you prefer a stronger scent.
- Pour your mixed diffuser oil into each diffuser. Each diffuser should hold 4 oz (or half cup).
- Add the plastic stopper and black cap to your diffuser.
- Customize, print, & apply your DIY reed diffuser labels (see below).
- Package diffuser and reed sticks as desired with crinkle-cut paper in a cellophane bag. Add a ribbon and gift tag to finish the gift!
>> I used my favorite holiday scent (Frasier Fir by Thymes) as my fragrance oil, but I would recommend Volcano by Capri Blue if you want a best-selling scent that can be used all year round!
Shop Reed Diffuser Supplies

Instructions for the Diffuser:
- Remove black cap and plastic stopper
- Replace black cap & insert reed sticks
- Let sit for 3-5 minutes
- Flip the reed sticks so the dry end is now in the oil
- Flip the reed sticks weekly or whenever the scent starts to fade
- Enjoy your scented space all season long!
DIY Labels
To make DIY labels, grab my reed diffuser template (click here) and customize it to your fragrance oil. Print the labels at home on Vinyl Sticker Paper (click here), cut out, and apply to your diffuser!
>> Read more about how to make DIY labels for any project HERE.
Let me know in the comments if you try these out! I would love to hear how they turn out!